This post is also available in
The basements are always mines of treasures, just look carefully at the things accumulated over the years and decide to give them a second chance with a fun upcycle DIY!
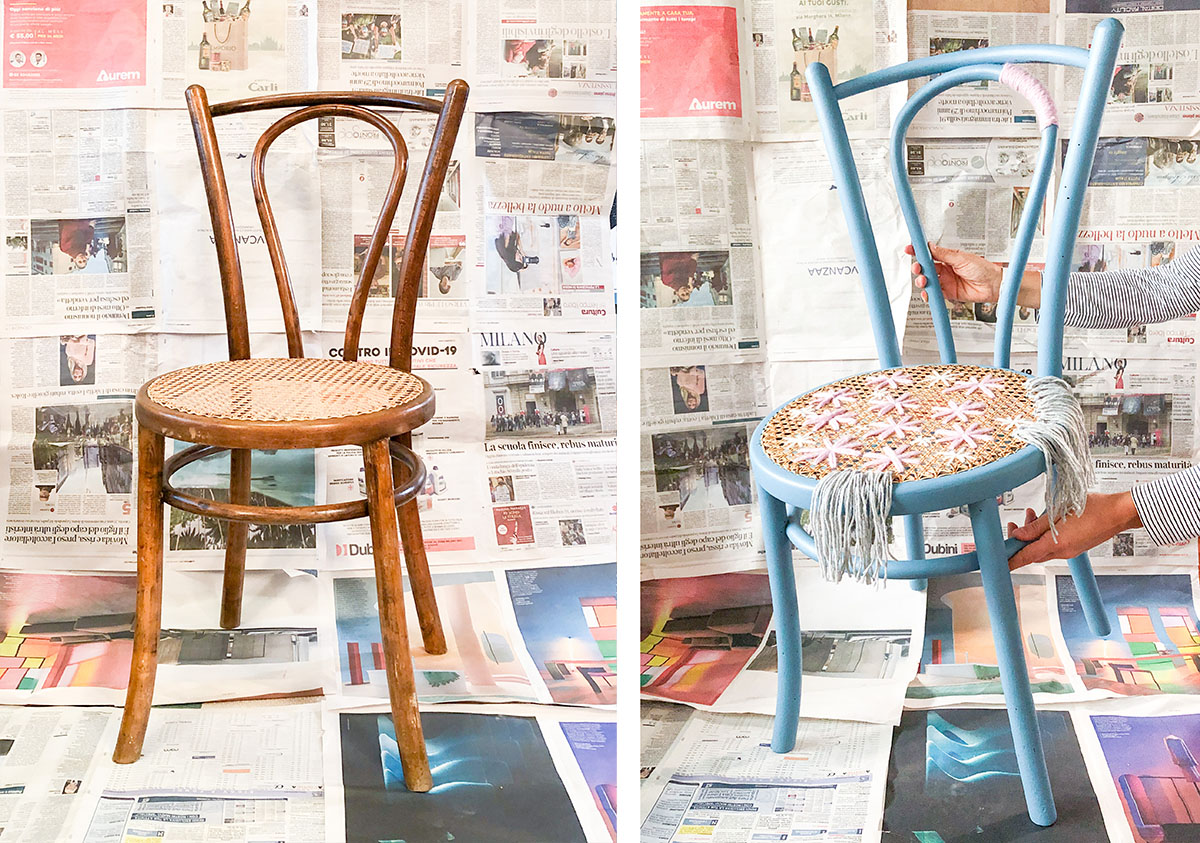
This is what happened with this old Thonet-style chair that had been lying in my basement for several years, one of my purchases from the flea markets.
It was in good condition but with some small flaws to fix.
I needed the “extra chair”, the one to pull out when needed but which during the rest of the time is “invisible”. Before buying the classic folding chairs I thought I’d give this old lady in wood and Vienna straw a chance.
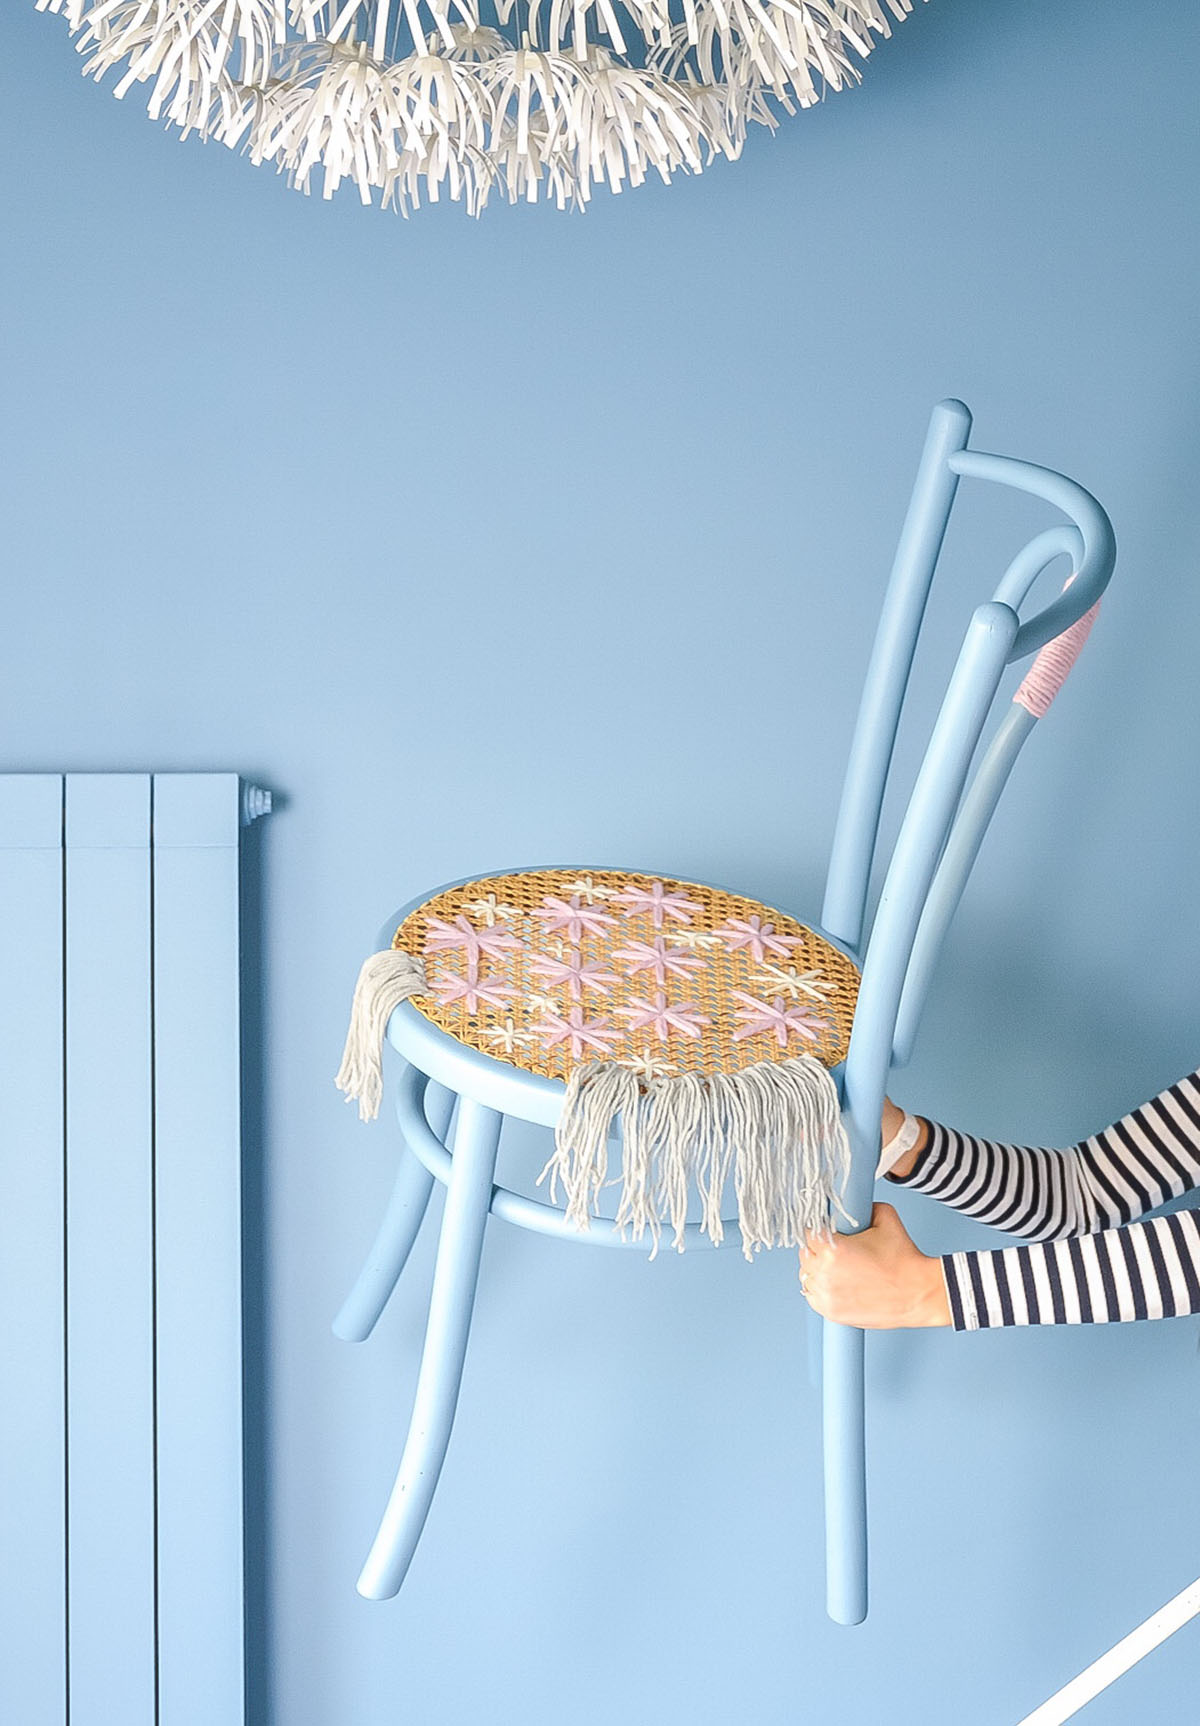
Vienna straw is now a globally interior trend. I thought of playing with color and creating a “camouflage” effect by painting it in the same color as the wall, with the idea that, when not needed, it becomes almost invisible!
Some paint has transformed my old chair wooden and Vienna straw chair, making it modern and adding a decorative touch with some woolen embroideries.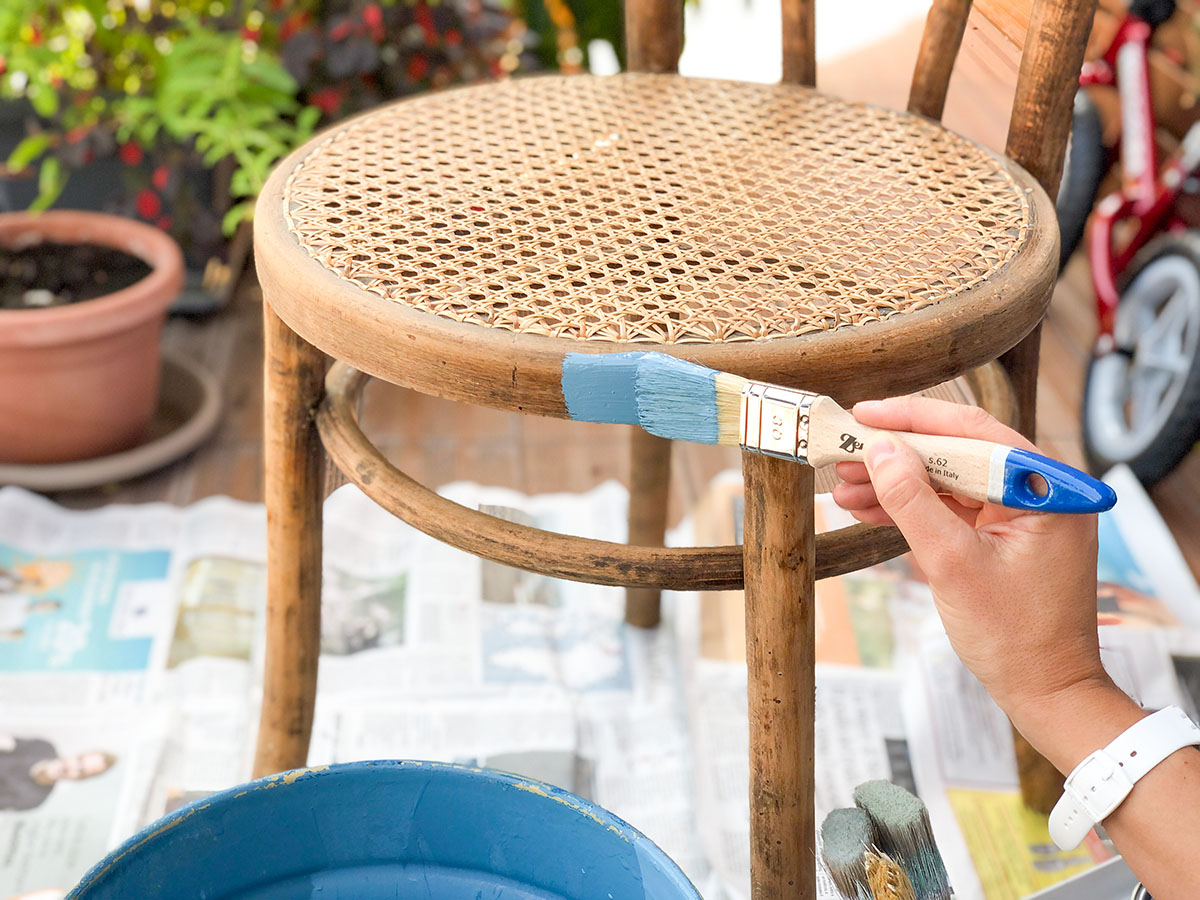
You can find the entire tutorial explained step by step on the Curver blog: how to clean the chair, removing old paint with sandpaper, coats of paint, and how to add the woolen details.
I didn’t just paint the chair, I also enjoyed adding a decorative touch and using the Vienna straw of the seat as if it were an embroidery cloth. I did not do a preparatory drawing, the flowers were born a bit spontaneous.
This could be a great idea to fix a slightly damaged Vienna straw or to make it more colorful without going to paint it. For a more scenographic effect, choose thick wool or double (or even triple) the thread and help yourself with large wool or crochet needle.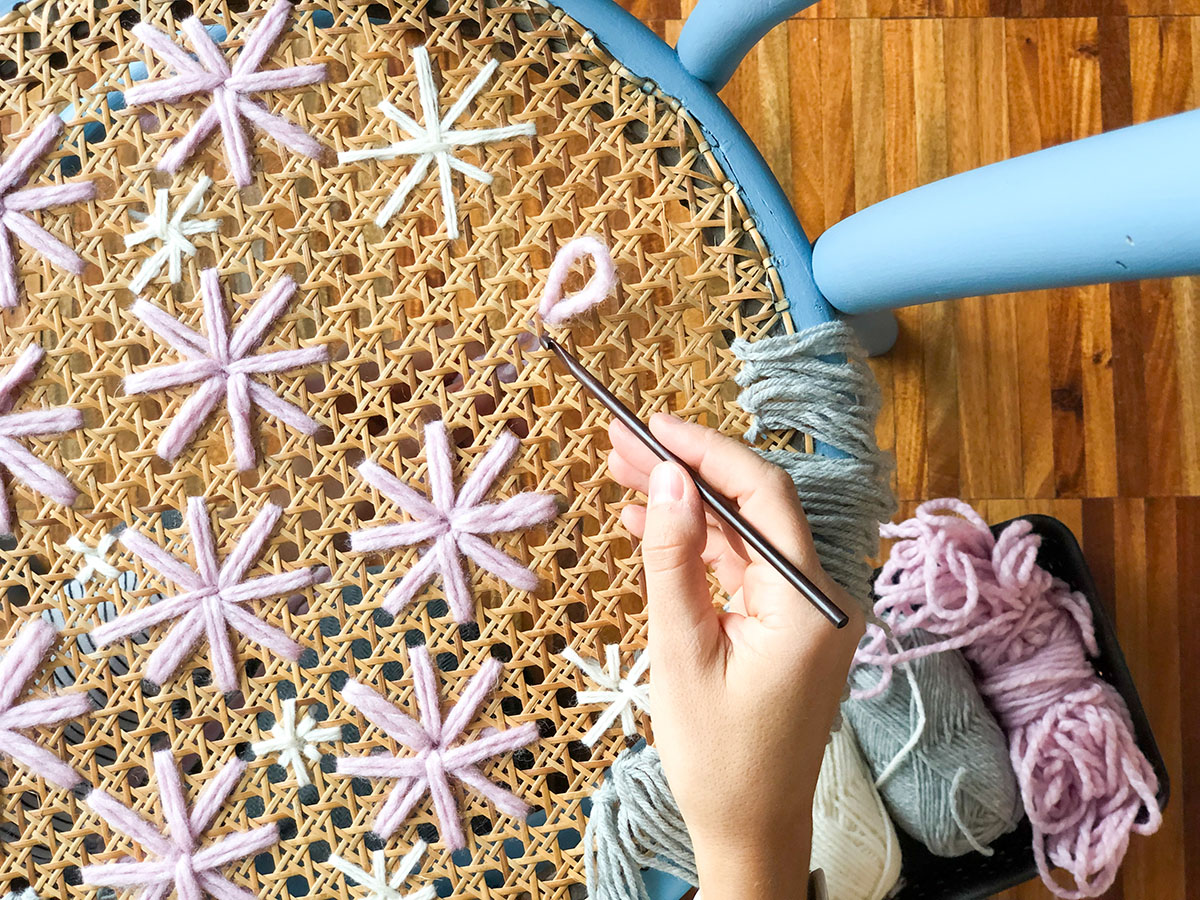
If you don’t know how to make the embroidery, proceed with the cross-stitch technique, the Vienna straw lends itself very well to follow the cross-stitch pattern.
I also added some side “fringe”, this too could be a useful trick to hide imperfections on the chair structure.
Then I added some pink color simply wrapping a small part of the chair’s back with some wool.
You can find the entire tutorial explained step by step on the Curver blog.
Blog post in collaboration with Curver.
You may also like